The Importance Of Bicycle Maintenance
I think bicycle maintenance is crucial for keeping your bike in optimal condition and ensuring a safe and enjoyable riding experience. Whether you're a casual rider or a dedicated cyclist, regular maintenance can extend the lifespan of your bike, improve performance, and enhance your overall riding enjoyment. Here are several reasons why bicycle maintenance is important:
I do want to start off by recommending a bike repair stand should be your number 1 one tool or first purchase. It will make your like so much easier. Even if you just use it to wash or lube your chain. The will stay in one position and not want to roll away while leaning against a wall.
1. **Safety**: Regular maintenance helps identify and address potential safety issues before they become serious problems. Ensuring that your brakes, tires, gears, and other components are in good working condition can prevent accidents and injuries while riding. You could perform safety checks even if you do not have the proper tools. Just get your hands on things like handlebars, grips, saddle wheel attachment areas, and feel for looseness. You should be able to catch a scary loose item at a minimum.
2. **Performance**: A well-maintained bike performs better. Keeping the drivetrain clean and properly lubricated, adjusting brakes and gears, and ensuring that all components are properly tightened can improve efficiency and responsiveness, making your rides smoother and more enjoyable. Minimum checks like air pressure and lubing the chain may be all that is needed on a weekly or bi-weekly pre-ride check.
3. **Cost Savings**: Regular maintenance can save you money in the long run by preventing costly repairs or the need for premature component replacement. By addressing minor issues early on, you can avoid more significant problems that may require professional repairs or replacements. Get yourself a chain checker and use it to check your chain monthly. The wear can differ depending on your mileage, weather, and how often you lube the chain. Treat the chain like an oil change for your car.
4. **Longevity**: Just like any mechanical device, bicycles require regular care to maintain their functionality and extend their lifespan. By keeping your bike clean, properly lubricated, and well-adjusted, you can prevent premature wear and tear on components, prolonging the life of your bike. Wash or wipe down your bike at least once a week. This will allow you to get eyeballs on almost every inch of the bike. You may spot something like a chip in the paint that could be an early sign of a dent in the frame (metal, carbon).
5. **Comfort**: A properly maintained bike is more comfortable to ride. Making sure that your saddle, handlebars, and other contact points are adjusted correctly can prevent discomfort and fatigue, allowing you to enjoy longer rides without discomfort or pain. Not only that, but any of these components could be loose, torn, or partially missing, making it a safety issue.
6. **Resale Value**: If you ever decide to sell or upgrade your bike, regular maintenance can help maintain its resale value. A well-maintained bike in good condition will be more attractive to potential buyers and command a higher price than one that has been neglected. The first and last thing people will see is optics. The visual appeal is always a factor when making a purchase.
7. **Environmental Impact**: Bicycles are an eco-friendly mode of transportation, and proper maintenance can help minimize their environmental impact. By keeping your bike in good condition, you can reduce the need for new parts and materials, as well as the energy required for manufacturing and transportation. Also important is the age of an item like tires, seat, and grip. if these are torn it will impact safty.
If you are not confident you can perform these inspections, find someone who can. You can also learn yourself with Arthur at Bike Teacher, located in San Jose, CA.

Update on The Park Tool BX-3 Mobile Toolbox
This is my current bike tool mobile toolbox, specifically for outdoor events.
From Arthur's Perspective
I've been using the smaller Park Tool 2.2 toolbox for about ten years, and it has served me well. However, I recently retired it in favor of the newer Park Tool BX-3 model. Towards the end of its life, I started using it more frequently for outdoor events, and cramming it with bike tools became essential. I did run into a problem with a bent hinge, likely due to my haste, but it still functioned with a bit of caution when closing.
The Park Tool BX-3 has been a game-changer for me. Its larger volume and additional organizational compartments have made finding and storing tools much easier, especially when sharing the bicycle toolbox with 3-4 other guys. The retractable walk, handle, solid rubber wheels, and sealed bearings are features that I particularly appreciate. It gives me confidence in its durability and ability to withstand heavy use.
The construction of the BX-3 toolbox is solid, and I feel assured that it can handle a beating and last a long time. However, the larger size does mean more tools get crammed in, making it heavier. The multiple handles and the cool addition of the hydraulic lid assist have been convenient.
Overall, I have found the BX-3 toolbox to be a significant upgrade with its practical design and durability. This is my honest opinion, and I have no affiliations with Park Tool or any other brands. Thanks, Arthur

What is a headset adjustment?
What is a headset and how to detect for looseness and how too adjust it.
Your bike may need attention and you may not know it. What is your headset and how do you check in on it? If it was a snake it would have bitten you already. The headset sits right in front of you while you are seated on your bike. It takes its name from the bike frames head tube, hence headset. It holds and carefully balances your handlebars to your fork and ultimately your front wheel. It holds the steering together tightly whilst keeping the steering buttery smooth in rotation.
The headset is comprised of ball bearings, smooth polished hardened surfaces and grease. Although very robust this must be adjusted with care and extreme delicacy. You can find the area to adjust at your stems top cap of a threadless headset. On a quill style stem the headset is adjustable at the very top of the bikes head tube. It is independent from the stem. The term threaded and Threadless refer to the forks steerer tube having or lacking threads.
Determining Play
The best way in my opinion to check for a loose headset if undetectable in normal use is to use the front brake. If it is obvious that the headset is loose you should be able to hear a clunking noise or light ticking if it is very loose. You may also be able to see movement in the headset which would be at the base of the stem. If there is a large amount of play in the headset you may be able to feel the play or looseness while gripping the stem with one hand while standing beside the bike. Do this while gently lifting up as to lift the bikes front wheel off the ground but don’t. Do this only enough to unweight the bike right before the front tire leaves the ground.
Best Method
My favorite way to test for a loose headset is to apply the front brake while straddling or standing over the bike. This way you can balance the bike and test at the same time. I then like to use my thumb and index finger placed both over a stationary portion of the frame (this can be a pressed in headset cup) and the headset. By placing your fingers over a fixed part of the bike frame and the component like the headset you will be able to feel for movement between the two. The last step is to gently motion the bike front to back repeatedly using your fingers that are placed on the headset area. Careful not to confuse the turning of the handlebars left to right with forward and backwards movement.
You should be able to determine if there is movement or not in less than five seconds. Keep in mind not to be rough in this motion, watch that the front tire does not slip forward or backwards during this process on the ground. Imagine that a cup of water has been placed on top of your saddle and try not to spill any water or drop the cup. I usually use the tips of my fingers to apply this motion at the handlebar, stem or headset.
Threadless Headset
A threadless style headset means the forks steerer tube is not threaded. And the stem will need to clamp onto the steerer tube gripping it firmly using only friction.The bolt used to lightly tighten the headset will remove play or looseness from the headset. This bolt (top cap bolt) is attached to the fork via the steerer tube. Using the stem as a spacer or foundation for creating leverage between the top cap and stem to pull up on the whole fork. Removing any play or space. By doing this the bearings are used as a bumper or contact area creating a smooth rolling feel for the steering system.
It is very important to not over tighten this headset bolt also called top cap and preload adjusting bolt. This bolt is typically tightened with care and delicacy. You may use a tool to tighten the top cap bolt but just be aware you are applying pressure to the ball bearings. The ball bearings need some pressure to activate but not too much pressure. As they will not move with ease if they are overtightened. The ball bearings will be smothered and steering will feel tight and restricted during rotation.
Over tightening a headset can and will prematurely wear out the bearings and the surface that they roll on, we call this area the race. The race and the ball bearings will get out of round and scoring will occur. Once this happens smoothness and adjustability will be compromised and the headset can be replaced at this time. I have seen headsets that have been overtightened for a long time and a simple adjustment of loosening the top bolt usually can fix this problem without residual damage. Anything past this will damage the headset bearings.
Making the Adjustment on Non Threaded
None of this can be done successfully on a threadless headset until the stem bolts have been loosened. The bolts do not need to be moved, just loose enough to loose the grip if the fork (front wheel). Do not worry about the front wheel alignment at this time, you may realign your handlebars as the last step. If the headset is extremely loose tighten the top cap bolt with a tool and light finger tips to the point of some resistance. Once the residual play is gone start you're fine adjustments here.
Turn the top cap bolt a half turn at a time testing for play after every adjustment, patience is key here. You want the play to just disappear, once the play has been successfully removed from the headset tighten the bolt an additional quarter turn. After a couple rides recheck your headset for play. It is not uncommon for settling to occur especially on a fresh installation. Realign the handlebars and front wheel at this time and tighten the stem bolts to the recommended torque by the stem’s manufacture.
Threaded Adjustment
An adjustment for a threaded headset may require the use of two wrenches, specifically headset wrenches. Headset wenches are very thin. You may be able to use one wrench and an adjustable wrench. There may be two similar looking adjustment bolts, the bottom one is the one making contact with the bearings so take care in this incremental adjustment. Once the play has been removed hold this bolt firmly in place as to be fixed and then tighten the top bolt with the appropriate tool. You are in essence locking the adjustment into place. This pressure should be very tight.
For a final check of the headset lift the front wheel off the ground by about two inches by the handlebars and rotate left to right. You are feeling for smoothness or roughness in the form of resistance. If this occurs loosen the headset by a quarter to a half turn at a time. I you are unable to remove the play and maintain a free flowing movement of the handlebars then it is possible the headset has permanent cage or the initial installation was compromised. A disassembly and inspection is due. How fun is this!
What is a common bike tune up?
Bike Tune Ups
Bike Tune Ups
When I start a bike tune up I usually follow a routine. I start with the wheels by removing them form the bike and installing them one by one on the bike truing stand. I like to use the Park Tool TS 2.2. My stand is about 8 years old and has been good to me with just minor adjustments needed. A truing stand is a must too completing a bike tune up.
A typical wheel true in a shop would consist of the lateral adjustments also called the side to side adjustment. If anything more than this is required it is an additional cost that may be added at the discretion of the shop. This is because more time will be taken that falls outside of a basic tune up. A good shop or mechanic should evaluate the bike at the time of drop off with you there to discuss options.
After truing both wheels they are installed back on the bike. I forgot one step which is to check the hubs for side to side play. This can be done on the bike or on the truing stand. Most adjustments may be required and are included in a bike typical or basic tune up. Loose ball bearing type hubs are most common for this opposed to sealed cartridge style.
At the time of wheel truing an experienced mechanic will do a check for loose or broken spokes during the tune up. These things sometimes do not show up when performing the wheel true. I once rode with a broken spoke for two rides before I realized one spoke had broken off at the nipple. If this happens to you on a ride most spokes can be twisted onto a neighboring spoke until it gets repaired. As long as you do not hit a pot hole hard and fast it can stay in true.
Once the wheels are back on the bike make sure that they are centered in the drop outs before you start the brake adjustment. A brake adjustment is a major component that is included in every bike tune up. By centering the wheels you are insuring that the brakes will be adjusted to a straight wheel rather than off center wheels. This may be noticeable when the wheels are removed and installed like transporting your bike in the car and then reinstalling the wheels, the wheels may center themselves and then you will find the wheel is now rubbing the brakes.
Resetting the cable at the brake’s pinch bolt is a must if the brake lever is close to or touching the handlebar or grip. This will take all the slack out of the braking system. A good tune up will remedy this common problem. This also means some brake pad material has been used up and is no longer there. This missing brake pad material is normal wear and tear and at some point the pads will need replacement.
Derailleurs are next on the list of a bike tune up and will be the most important component as well as the most troublesome for most bike owners to adjust on their own. If your bike has derailleurs think of them as having two transmissions on your bike. These help you pedal with efficiency and speed. The higher the level of component the easier it is to adjust and the longer it will stay in adjustment form a mechanics perspective keep in mind an ongoing evaluation of bike and components are being done at this time.
Inspection in a bike tune up is crucial especially for a bike shops profitability. Evaluating wear and tear items like chain, brake pads, tires, saddle, hand grips, fraying cables & housing are important. Things like suspension fork and rear shock should be kept track of as well by hourly use. Inspect shocks by looking for torn seals, oil leaks and deep scratches in the stanchion tubes.
The last two procedures to be completed in a bike tune up are a bolt safety check and air in the tires. Be sure to put a tool on every visible bolt to check for tightness. A torque wrench is the best first choice especially if you lack the experience to manage this by feel. Every tire’s psi can be different so be sure to find this information on the sidewall of the tire. Filling up to about 80% of the recommended tire inflation is a good place to be. This allows the tire some flex and bounce while allowing for cushion and grip in return. Of course rider weight and cargo must be taken into consideration.
Arm yourself with these tips.
A few tips on choosing a bike repair shop
Bike repair service in San Jose CA., Willow Glen. This shop services all types of bikes from kids bikes to adult, sports enthusiasts, mountain bike, road bike and weekend warriors. Bike repairs can be done in a 24 hour turn around basis sometimes by appointment for tune ups or larger jobs. Flat tire repairs can per performed on the spot with no wait time.
Bike Repair Shops
Most derailleur adjustments and brake adjustments can be performed on the spot. Bike Tune ups on the other hand can take anywhere from 45 minutes to 2 hours. A long as all work falls with in the scope of the outlined Tune up. The term “bike repair” is a term most commonly used to describe a single or several adjustments like a brake or derailleur adjustments. Don’t get this term confused with Bike Tune up.
A tune up can be defined as a bike repair but will address a checklist and that will be charged as one lump sum. I will cover bike tune ups in more detail in another article. Basically a tune up is the goto service that will give your bike an overall safety check, adjustment and assessment of it’s current health.
You may or may not know this but bike repair shops have different personalities. The experiences some people have shared with me have been equally good and bad. A consistent problem that keeps showing its ugly head is good work on a regular basis. For example, I have been told that a customer gets their bike repaired sometimes three and four times for the same problem because the problem was never really resolved. What are the reasons for this?
They either got their bike back in the same condition (not repaired), worse condition or a new problem is to be found. There are a few variables that can contribute to bad bike repair service. Ultimately this is the responsibility of the owner or management. Inexperience as a bike mechanic in the service department is the number one problem. What goes hand in hand with experience is the ability to listen to the customers main concern and finding the source of the problem they are experiencing. I would say these two things are very important qualities in a good bike repair shop or mechanic.
If you are looking for a good or great bike repair shop I would say look for these two qualities right off the bat. What is the best way to figure this out? In a lot of ways you are trying to decode or decipher the temperament of the bike repair shop. You are in someways trying to figure out whether or not they are bs artists (liars). What you are really trying to figure out is if they know how to diagnose and find the issues you are experiencing.
Do they have the ability to listen to the customer? Do they have an experienced bike repair mechanic that can diagnose the problem correctly? Everything else is secondary like availability of parts and the efficiency to complete the job in a timely manner. Once they have your confidence you still must be willing to work out unforeseen delays. Wether this falls on the shop or a manufacturers stocking issues or shipping delays we as customers still must be flexible.

Should you worry about a little disk brake rub?
Is a little disk brake rub okay?
My approach to disk brake troubleshooting is simple. I approach it like everything else on the bike. It starts with diagnosing the origin of the problem in the simplest, cheapest and fastest way. Key elements? Don’t get your fingers caught in the rotor (disk). There are many different problems that can occur with disk brakes just like rim brakes. The number one complaint you will come across is brake rub.
Brake rub is usually accommodated with a noise like a squeal or screech. There are a few ways to determine the severity of the brake rub. Is it stopping the wheel too soon? Is it always noisy? Is the rub something you cannot live with? Most of the time the wheel should be spinning freely and quietly. What will usually get your attention or your ridding buddies attention is a noisy disk brake, sometimes with the brake applied and sometimes not. Whats happening here is one or more brake pads are lightly touching the brake rotor.
If it’s noisy when applying the brake lever that is a sign of some form of contamination. The easiest to deal with is dirt, the harder one to remedy is oil. Dirt on the disk brake or the brake pad can be addressed on its own. Most cases it will clean itself in due time. Oil contamination on the other hand will have destroyed the brake pads almost immediately and will now be considered garbage. The brake rotor or disk can be cleaned with isopropyl alcohol.
Remember this, cleaning the brake rotor will also strip off the good brake pad material and the disk or brake rotor will need to be reintroduced to the brake pads material again. This can be done by braking gently several times in the parking lot. You are basically coating the brake disk with brake pad powder making the contact surface of the brakes rotor tacky or increasing the resistance.
Sometimes the rub is not enough to stop the wheel but maybe just enough to create brake noise and not enough to notice the resistance when pedaling. My first suggestion is do not attempt a brake adjustment unless it is something you cannot live with. The reasoning for this is that there is not a lot of room between the brake pads and the rotor for adjustment in the first place. Attempt this only if you have patience and are willing to master the adjustment.
There is approximately a millimeter in a half (1.5mm) on each side of the brake pad and rotor and thats being generous. Don’t get discouraged you can still be very successful with a little practice. Repetition is key for learning any new task. Become comfortable with the uncomfortable. I hear that term a lot in sports and I think the same applies here with brakes rubbing the rotor. If you are experiencing a brake rub of some sort there is no immediate danger for your safety or the health of the bike in any way in most cases.
You may be experiencing a light brake rub or disk brake drag and not even know it. I suppose there is a possibility of heat developing from brake drag but it is not enough to create problem. In order for there to be concern from a bad brake rub the wheel would not be able to spin several times before it stops. This is all relative to how hard you spin the wheel when testing. This is something that is hard to learn if you are not used to working on your bike or with your hands. Videos may not be enough to help you with “the feel” of something. Thats where getting hands on help can be beneficial.
A.R.

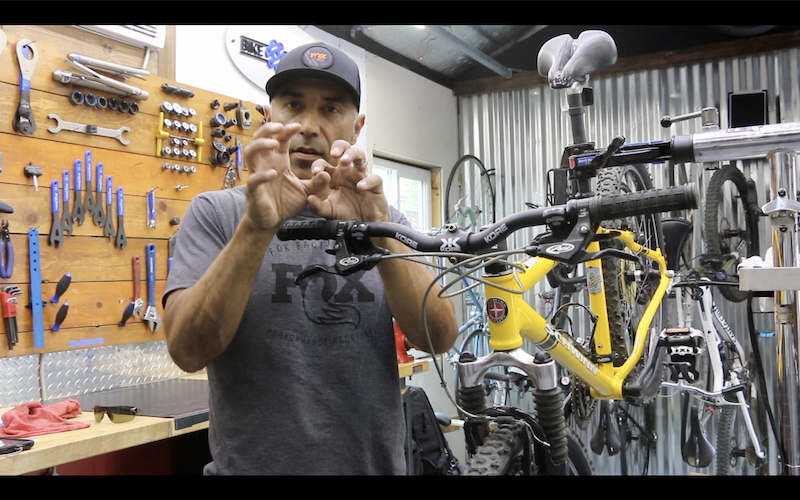
The many beautiful layers of the rear derailleur.
The different personalities of the rear derailleur.
The Different Personalities of the Rear Derailleur
When adjusting a rear derailleur I like to break it down into segments. There is a starting point I like to refer to as home base or restarting the computer. This is the place you will start when first installing a rear derailleur on to the bike and the the place you will start when you get confused and need to re-establish what exactly is going on. Home base, just like playing hide n go seek as a kid, you need to establish common meeting ground. It will also help you to find the problem of why the rear derailleur is having trouble.
The derailleur and the chain will be referred to synonymously. The chain is going nowhere unless the rear derailleur tells it to move. The chain and the shifter should always be on the same page. It’s up to you to keep track at all times. One of the best ways to do this is to pay close attention to the clicks in the shifter at all times. If you hear or in some cases feel a click then there should be chain movement.
One click should equal one gear change of the rear derailleur (cassette or cog, chain). In some cases two clicks of the shifter can happen very quickly but are often missed by the operator and the operator ends up lost immediately. People are surprised at how intricate a shifting system can be. There are a lot of variables and every bike has a different temperament. Not all derailleurs and bikes are created equally.
You must take into consideration the age of the component and the level or model. Cost plays a big part I this. Typically the more you pay the better the materials, engineering and quality in most cases. What this means is the more you pay the lighter the part and performance is enhanced. If a rear derailleur, shifter, cable and housing are tired or dirty and has many miles on it then you must take this into consideration as well.
If the moving parts of the component are not working the way they use to when they were new, this usually means the pivot points in a rear derailleur are not as tight, there is more play between hinges. All this adds up to looseness or play that may not be felt all the way back to the shifter. It’s like having a worn out shoe or loose shoe laces. Your foot will slide even it is a small amount but this will add up over time causing a blister.
When this happens to a rear derailleur some of this can be addressed with the barrel adjuster until it can no longer, then what? How do you diagnose a worn out rear derailleur? How can you tell if the derailleur alignment is incorrect? Which one is to blame? Stay tuned.
A.R.

I hate patching tubes.
A key failure in patching a tube.
Bicycle repair service in willow Glen CA. The shop is easily accessible and located on the corner of Pine ave and Jaunita Ave. You can find it between the major streets if Bird ave and Lincoln ave in San Jose. This is a neighborhood friendly bike repair shop that caters to family bikes to serious bike racers. We cover basic repairs like flat tires, brake and derailleur adjustments to ground up bare frame bike builds. We cover the serious mountain bike that rides in the Santa Cruz Mountains to all sorts of weekend warriors and commuters.
Replacing a Tube vs. Patching a Tube
Bike repairs can fall into different categories. The most common are flat tire repairs or often called tube replacement. Bicycle tubes are replaced now a days rather than repaired by patching. Patching can be unpredictable. If the patch is not applied correctly it can and will fail. Usually by the ends of the patch coming up by loosing adhesion.
The most common error when repairing a tube by patching is the preparation. If you are in hurry and do not scuff the area enough or most commonly not covering a big enough area for adhesion. The size of the prep area should be twice the diameter of the patch size you are using.
Scuffing of the area should easily be seen after the patch is applied. This goes for the glue as well if you are using a patch kit with glue. The area the glue should cover should be at least a size in a half if not doubled in size of the patch size. Using a little extra glue could mean the difference between a long lasting patch job or the patch failing off the the next day. Another important detail is trying not to touch the prep area with your fingers. Any dirt or natural oil from your fingers can contaminate the adhesion process.